
How to Reduce File Size Without Losing Quality
Introduction
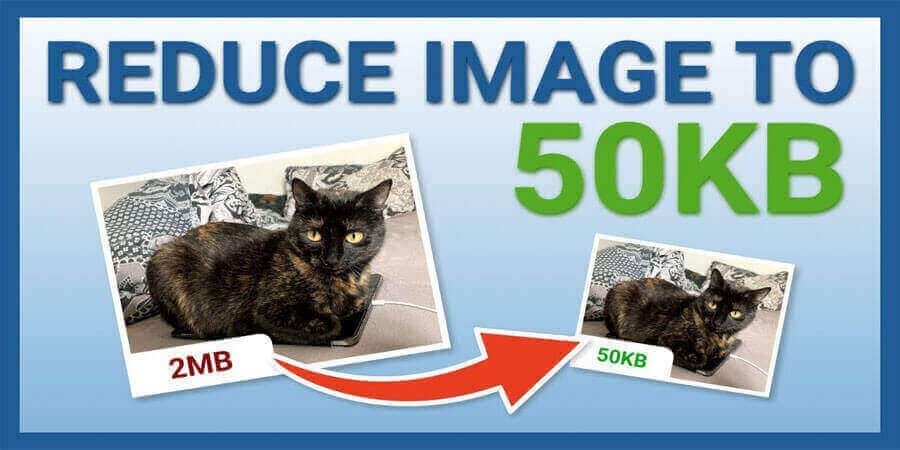
File size matters. From archiving personal photos to managing professional video projects, large files can hamper productivity, take up valuable storage space, and slow down network transfers. Yet, the most common solution—heavy compression—often erodes quality, whether it’s a blurry image or choppy video. So how can you effectively reduce file size without taking a noticeable hit in quality?
This guide provides a deep dive into strategies, tools, and best practices for shrinking file sizes—be it images, videos, PDFs, or music—while retaining essential clarity and fidelity. By balancing the right compression methods, format choices, and advanced techniques like AI-driven upscaling, you can optimize your workflow and keep your digital assets lean.
1. Why Reducing File Size is Important
-
Faster Uploads and Downloads: Large files can clog bandwidth, leading to delays. Smaller files ensure smoother transfers, especially on limited internet connections.
-
Storage Savings: Cloud storage fees and local disk capacities can rack up if you’re dealing with raw photos, high-resolution videos, or massive PDF documents.
-
Better Collaboration: Whether you’re emailing an attachment or syncing documents, smaller files load quickly and enhance real-time collaboration.
-
Enhanced User Experience: For websites or apps, optimized media (images, audio, video) leads to snappier performance and improved user retention.
-
Compliance and Archiving: Some industries require long-term data retention. Smaller, efficiently compressed files reduce archiving costs and complexity.
Real-World Example: A small marketing agency struggled with 200 MB InDesign files that constantly exceeded email limits. By learning efficient export settings and focusing on image compression, they cut final deliverables to under 30 MB—still retaining print-ready quality.
2. Understanding Compression Basics
Compression is the process of reducing a file’s size by reorganizing data or removing redundancies. There are two core types:
-
Lossless Compression: No data is permanently removed. It’s fully reversible—decompressed data matches the original bit for bit. Examples include PNG (for images), FLAC (for audio), ZIP/7Z archives.
-
Lossy Compression: Data deemed “less critical” is discarded, resulting in smaller sizes but irreversible changes. Commonly used in JPEG images, MP3 audio, and most video codecs.
Key Insight: Lossless compression preserves 100% fidelity but yields smaller size reductions. Lossy can achieve drastic reductions, but poor settings degrade quality.
3. Working with Images
Images are among the most frequent culprits of bloated storage. Luckily, you can significantly shrink image files while retaining clarity.
3.1 Choose the Right Format
-
JPEG (Joint Photographic Experts Group)
-
Best For: Photographs or gradients.
-
Compression: Lossy. Quality settings vary from 0–100.
-
Why It’s Good: Fine-tune compression for the desired trade-off in file size vs. sharpness.
-
-
PNG (Portable Network Graphics)
-
Best For: Graphics, logos, text overlays. Lossless.
-
Why It’s Good: Preserves crisp lines, transparency, and color fidelity.
-
Downside: Larger than JPEG for photographic images.
-
-
WEBP
-
Developed By: Google. It offers both lossy and lossless modes.
-
Benefits: Often smaller than JPEG or PNG with comparable quality.
-
Drawback: Some older systems might not support it.
-
3.2 Resolution and Dimensions
-
If your platform displays images at 800×600, there’s no need for a 4000×3000 version. Downscaling drastically cuts file size.
-
DPI/PPI: Printing typically requires 300 DPI; on-screen images can do fine at 72–150 DPI.
3.3 Compressing without Significant Quality Loss
-
Use Tools: Photoshop’s “Save for Web,” GIMP’s “Export As,” or online services like TinyPNG and TinyJPG.
-
Quality Slider: Aim for a JPEG quality around 70–85%. This often yields big savings with minimal artifacting.
-
Color Depth: Reducing bit depth in PNG (from 24-bit to 8-bit) can significantly shrink size if the image has fewer colors.
-
Metadata Stripping: Remove EXIF data (camera settings, GPS) when unnecessary.
3.4 Advanced Image Optimization
-
Vector Formats: For flat graphics or logos, use SVG. It scales infinitely with minimal size.
-
Multi-pass Tools: Tools like ImageOptim or Caesium can do iterative compression.
-
AI Upscaling: Some workflows compress images, then later upscale them with AI. This is more advanced but can preserve detail while shipping smaller files initially.
Pro Tip: For large photo collections, adopt a consistent naming and versioning approach. Always keep a master uncompressed or raw version, and produce optimized copies for daily use.
4. Dealing with Video
Videos, especially HD or 4K content, are notorious for hogging storage and bandwidth. But smart optimization keeps them watchable.
4.1 Select Efficient Codecs
-
H.264/AVC
-
Widely compatible, used for most streaming.
-
Balanced efficiency and quality.
-
-
H.265/HEVC
-
Superior compression, can halve file size vs. H.264.
-
Needs newer hardware or software support.
-
-
VP9 / AV1
-
Open-source, powerful compression. Common on YouTube.
-
AV1 is cutting-edge but not universally supported yet.
-
4.2 Bitrate Control
-
Constant Bitrate (CBR): Simple but can waste data on low-complexity scenes.
-
Variable Bitrate (VBR): Adjusts bitrate in real-time based on scene complexity, maintaining quality where needed.
-
Target Bitrate: Tools like HandBrake or FFmpeg let you specify a kbps goal, balancing size vs. clarity.
4.3 Resolution and Frame Rate
-
Downscale: 1080p or 720p might be enough if 4K isn’t mandatory.
-
Frame Rate: 60 fps doubles data compared to 30 fps. Evaluate if smoother motion is vital.
4.4 Keyframe Interval and Audio Settings
-
A longer GOP (Group of Pictures) can yield smaller files but slightly affect seeking.
-
Audio: Converting uncompressed or high-bitrate audio tracks to AAC or MP3 can save MBs.
4.5 Practical Video Tools
-
HandBrake: User-friendly, robust presets for H.264/H.265.
-
FFmpeg: Command-line powerhouse for batch processing and advanced parameters.
-
Adobe Media Encoder: Professional solution integrated with Premiere Pro.
Real-World Example: A marketing team producing tutorial videos might record in 4K, then export final drafts at 1080p with a moderate bitrate. They also experiment with H.265 for significantly reduced sizes while retaining crisp visuals.
5. Taming Audio Files
Audio can inflate quickly if you use uncompressed or high-res formats.
-
Lossless vs. Lossy
-
FLAC or ALAC (Apple Lossless) preserve original waveforms but can still be ~50% of WAV.
-
MP3 or AAC can yield 5–10× smaller files, but at very low bitrates (e.g., 64 kbps), clarity degrades.
-
-
Bitrate and Sample Rate
-
320 kbps MP3 is near CD quality. You can try 192 kbps for casual listening.
-
Reducing sample rate from 48 kHz to 44.1 kHz might be enough for typical uses, slightly shrinking size.
-
-
Mono vs. Stereo
-
If content is purely speech or single-channel, forcing mono halves data.
-
-
Batch Conversion
-
Tools like dBpoweramp or Audacity handle mass conversions. Always test a short sample to ensure acceptably minimal artifacts.
-
Pro Tip: For podcasts, 64–96 kbps mono MP3 is often enough for voice without huge size overhead.
6. PDF and Document Optimization
Office docs can swell with embedded fonts, images, or macros. Meanwhile, scanned PDFs can be monstrous if poorly compressed.
6.1 PDF Tricks
-
Use “Save As Optimized”
-
Adobe Acrobat Pro or online tools let you reduce image resolution or compress them.
-
-
Downsample Images
-
300 DPI is ideal for print, but 72–150 DPI is fine for on-screen.
-
-
Remove Embedded Fonts
-
If text is standard, you might rely on system fonts or subset them.
-
-
Flatten Layers
-
Some PDFs store multiple layers (from InDesign or Illustrator). Flattening helps.
-
6.2 Word Processor Files
-
Compress Embedded Media: Word or PowerPoint’s “Compress Pictures” option.
-
Save as Binary: For huge Excel sheets,
.xlsbcan be smaller than.xlsx. -
Delete Revision Logs: Track changes can bloat the file.
-
Clean Metadata: Tools or built-in settings can remove hidden data.
6.3 Tools for PDFs
-
Adobe Acrobat: Detailed controls for image quality, font embedding.
-
Foxit PhantomPDF: Offers advanced optimization options.
-
Online PDF Compressors: E.g., Smallpdf, PDF2Go, iLovePDF.
Scenario: A researcher dealing with scanned documents can drastically shrink a 50 MB PDF to 5 MB by applying OCR and downsampling images to 150 DPI.
7. Combining Archives and Compression
Creating archives (ZIP, RAR, 7Z) is a universal approach to compress multiple files or entire folders.
-
Choose the Right Archiver
-
7-Zip with LZMA/LZMA2 can be more efficient than standard Zip.
-
RAR offers strong compression but is proprietary.
-
-
Solid Compression
-
Archivers can treat multiple similar files as one data stream, boosting ratio.
-
Good for large sets of text or repeated data.
-
-
Split Volumes
-
Breaking an archive into parts can circumvent email or hosting limits.
-
-
Encryption
-
Tools like 7-Zip, WinRAR let you password-protect archives. This can hamper compressibility if done at the file level first.
-
Pro Tip: Always compress unencrypted versions if possible, then apply encryption. Compressing already encrypted data typically yields minimal gains.
8. Maintaining Quality in a Lossy Workflow
Lossy compression can degrade quality with each re-encode. Avoid repeated cycles:
-
Keep a Master Copy
-
Always preserve an original or high-fidelity version.
-
Export compressed copies from the master as needed.
-
-
Consolidate Edits
-
Instead of editing, saving, and re-compressing multiple times, do all changes in a lossless environment.
-
-
Use Lossless Intermediates
-
Video editors often rely on ProRes or DNxHD for editing, applying final compression only in the end.
-
Verdict: Minimizing compression steps ensures you don’t accumulate generational loss.
9. Automation & Batch Processing
Manually optimizing hundreds of files is tedious. Automation saves time:
-
Command-Line Tools
-
FFmpeg: For video or audio batch conversions.
-
ImageMagick: For resizing, compressing images via scripts.
-
-
Dedicated GUIs
-
Bulk apps like XnConvert, FastStone Photo Resizer, IrfanView (batch mode).
-
-
CI/CD Pipelines
-
In professional environments, hooking a compression step into continuous integration ensures all media is optimized upon upload.
-
-
Plugins
-
For WordPress or CMS, compression plugins can auto-optimize images on upload.
-
Example: An eCommerce site uses a script that runs daily, scanning new product photos in a folder, resizing them to 1080×1080, compressing to JPEG quality 80, then uploading them automatically.
10. Minimizing Negative Visual Artifacts
Compression artifacts can appear as blockiness, color banding, or fuzziness. Mitigation tips:
-
Slight Overshoot
-
Save a higher quality version than you think necessary (e.g., 85% JPEG). A small size difference might preserve detail.
-
-
Dithering
-
For PNG with reduced color, dithering can smooth out banding.
-
-
Spatial vs. Temporal (Video)
-
For video, controlling motion search or keyframe intervals can reduce blocky frames in dynamic scenes.
-
-
Visual Inspection
-
Automated metrics (PSNR, SSIM) help, but a human check ensures important details remain.
-
Pro Tip: If artifacts become noticeable, tweak settings or adopt a more advanced codec at slightly higher bitrates.
11. Storage and Streaming Protocols
While not purely about re-encoding, choosing efficient protocols matters for size or distribution:
-
HTTP/2 or HTTP/3
-
Speeds web-based file delivery with multiplexing.
-
-
RTMP vs. HLS (Video streaming)
-
HLS chunked segments adapt to bandwidth; keeps perceived quality high.
-
-
Compression on the Fly
-
Web servers can Gzip or Brotli text-based files (HTML, CSS, JS). Lossless but shrinks payload.
-
Verdict: Packaging content via modern streaming or web protocols ensures minimal overhead beyond your chosen compression.
12. Checking Compatibility vs. Optimization Level
Highly advanced or newer formats can yield best compression but hamper compatibility:
-
HEIC / HEIF (Images)
-
Superior to JPEG but not widely supported by older OS/browsers.
-
-
Opus (Audio)
-
More efficient than MP3/AAC, but older devices might not decode it.
-
-
AV1 (Video)
-
Great compression, but hardware support is limited.
-
Recommendation: Evaluate your target audience or devices. Falling back to mainstream formats like JPEG or MP4 (H.264) might be safer if universal support is required.
13. Using AI and Machine Learning
AI-based solutions can salvage quality in extreme compression scenarios:
-
Upscaling Tools
-
Waifu2x, Topaz Gigapixel AI: Upscale small or compressed images, potentially hiding artifacts.
-
-
Denoisers / Deblockers
-
Some advanced ML tools can remove blocky compression artifacts from images or video, simulating original detail.
-
-
Context-Aware
-
Neural networks compress data by understanding content context (faces, text, backgrounds) differently.
-
Caution: AI improvements can’t fully restore severely lost data. They do well in mitigating mild artifacts.
14. Balancing Archival Integrity and Future Use
Archival typically demands lossless or near-lossless formats:
-
RAW Images
-
Photographers keep raw for maximal editing flexibility.
-
For distribution or quick reference, they produce compressed JPEG/WEBP.
-
-
Lossless Audio
-
Archiving masters in FLAC ensures no generational loss.
-
Offer compressed MP3 for streaming or sharing.
-
Pro Tip: Keep an uncompressed or lightly compressed “golden master.” All subsequent versions can be more aggressively compressed as needed.
15. Fine-Tuning Documents and Spreadsheets
Large Word or Excel files hamper loading:
-
Remove Hidden Data
-
Versions, track changes, or comments can bloat the file.
-
-
Clear Unused Ranges
-
In Excel, highlight beyond used cells and delete. Sometimes old pivot caches remain.
-
-
Convert to CSV
-
If advanced formatting isn’t needed, CSV is far smaller for purely textual data.
-
-
Save as Binary
-
Excel’s .xlsb format is more compact than .xlsx.
-
Scenario: A finance department’s quarterly workbook shrank from 80 MB to 10 MB by removing extraneous tabs, pivot caches, and saving as .xlsb.
16. Post-Compression Validation
After compressing or optimizing, ensure functionality or visual fidelity is intact:
-
Test Opening: Confirm the file opens on relevant software or devices.
-
Check Integrity: Use checksums if needed or built-in “repair” features.
-
Review Quality: Compare side-by-side with original for image or audio.
-
Workflow Integration: Ensure any scripted or automated processes that rely on file structure (like advanced PDFs) still function.
Key Insight: Always keep a fallback original until fully verifying the optimized version.
17. Common Mistakes to Avoid
-
Repeated Re-Compression: Each cycle can degrade lossy files.
-
Setting Quality Too Low: Gains a small additional size reduction but drastically worsens clarity.
-
Using the Wrong Tool: Some quick online compressors might do blanket compression ignoring better solutions or partial color.
-
Forgetting Thumbnails: If generating many thumbnails, ensure they’re compressed too.
-
Overlooking Hidden Elements: Layers or alpha channels in images that are unnecessary.
Pro Tip: Gradual approach—reduce size in increments, verifying each time you haven’t gone below acceptable quality.
18. Putting It All Together
Strategy:
-
Identify file type (image, video, PDF, etc.)
-
Choose an appropriate format (lossy vs. lossless) and tool.
-
Adjust resolution/bitrate/quality sliders carefully.
-
Test results—ensure usability remains high.
-
Archive the original for safekeeping.
Workflow Example:
-
A blogger compresses images to 1280×720 at 80% JPEG quality using an automated script. Videos are encoded at H.264, 2 Mbps target bitrate for quick streaming. PDFs are saved as optimized with 150 DPI images.
Outcome: Site loads quickly, minimal hosting fees, visitors remain happy with crisp visuals.
Conclusion
Reducing file size without losing quality is a balancing act—requiring thoughtful compression choices, format selection, resolution optimization, and a final review of the results. By understanding how data is stored and how compression algorithms work, you can preserve essential details in images, videos, audio, or documents while slashing unnecessary bulk. Whether it’s a handful of personal photos or massive corporate data sets, the principles remain the same: start with the right format, compress wisely, keep a high-quality master, and validate the outcome.
This disciplined approach to optimization not only saves disk space and bandwidth, but also enhances collaboration, speeds up websites, and lowers storage costs. The next time you’re confronted with an oversized file—be it a 4K video, a design project, or a scanned PDF—remember these techniques to streamline size while keeping quality firmly intact. With practice, you’ll develop an instinct for how much compression each file type can bear, ensuring an efficient, visually pleasing, and cost-effective workflow.
Popular articles


Comments (0)